Within this article you will find a step-by-step walkthrough on how to move users between locations.
Note: To perform the task described in this article, you must have Admin permission. If you do not have the necessary access, please contact your company's administrator for assistance.
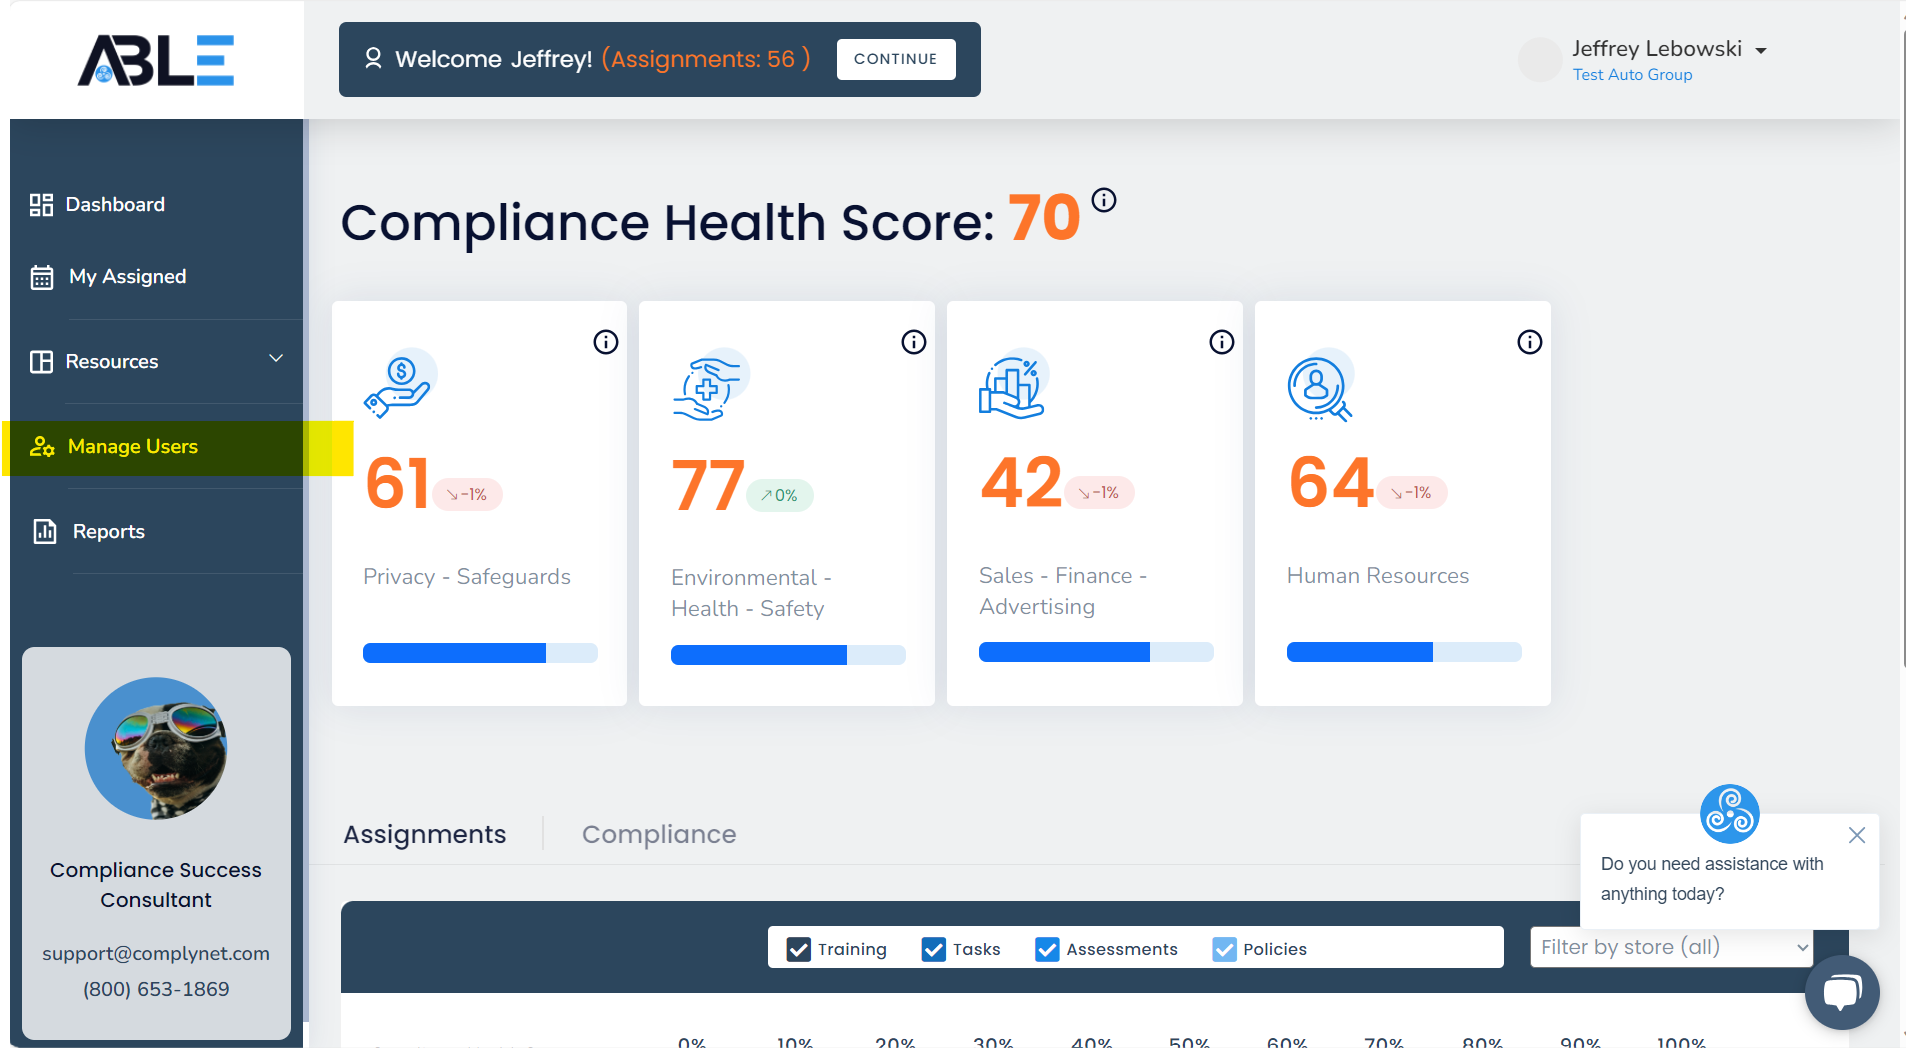
→ To start, click the "Manage Users" tab found on the left hand side of your screen.
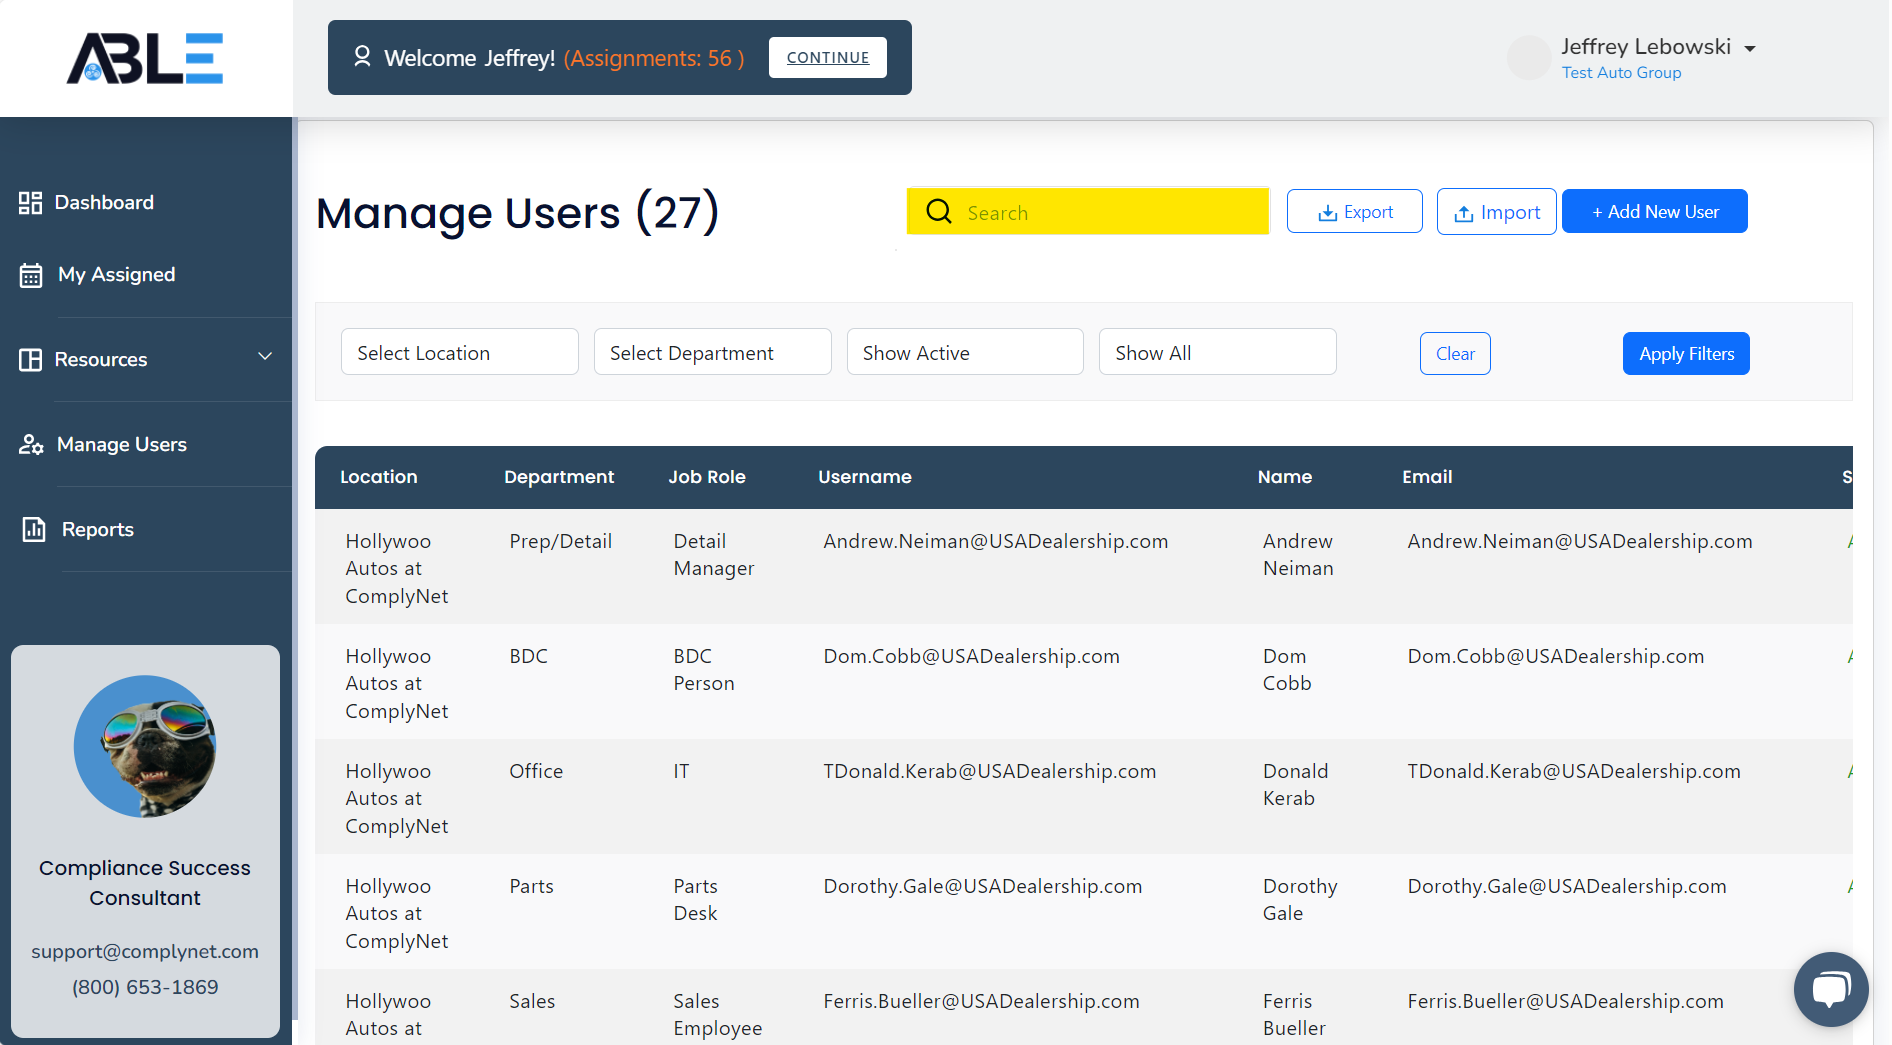
→ Once you are on the Manage Users page, use the Search feature to locate the user you wish to move.
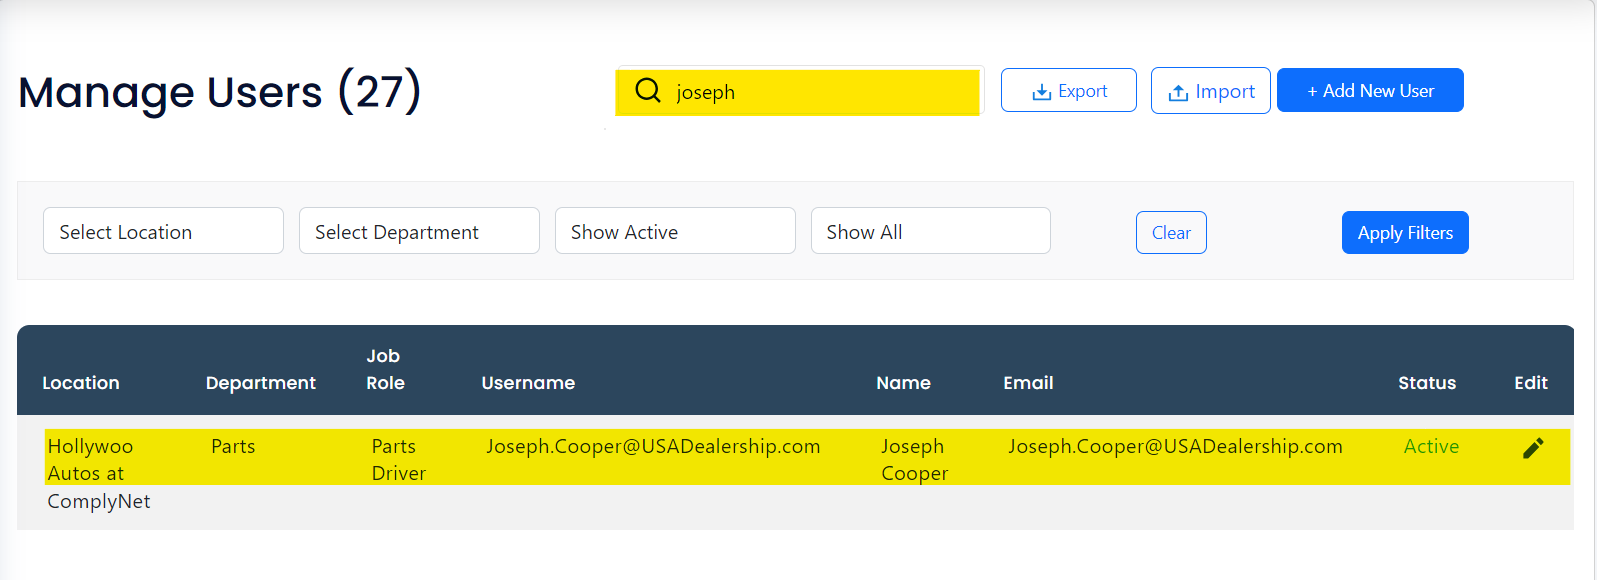
→ After finding the desired user, click their profile.
→ A pop-up window will appear displaying the user's profile. By default, you will be directed to the Edit page, which is where you need to be in order to complete this task.
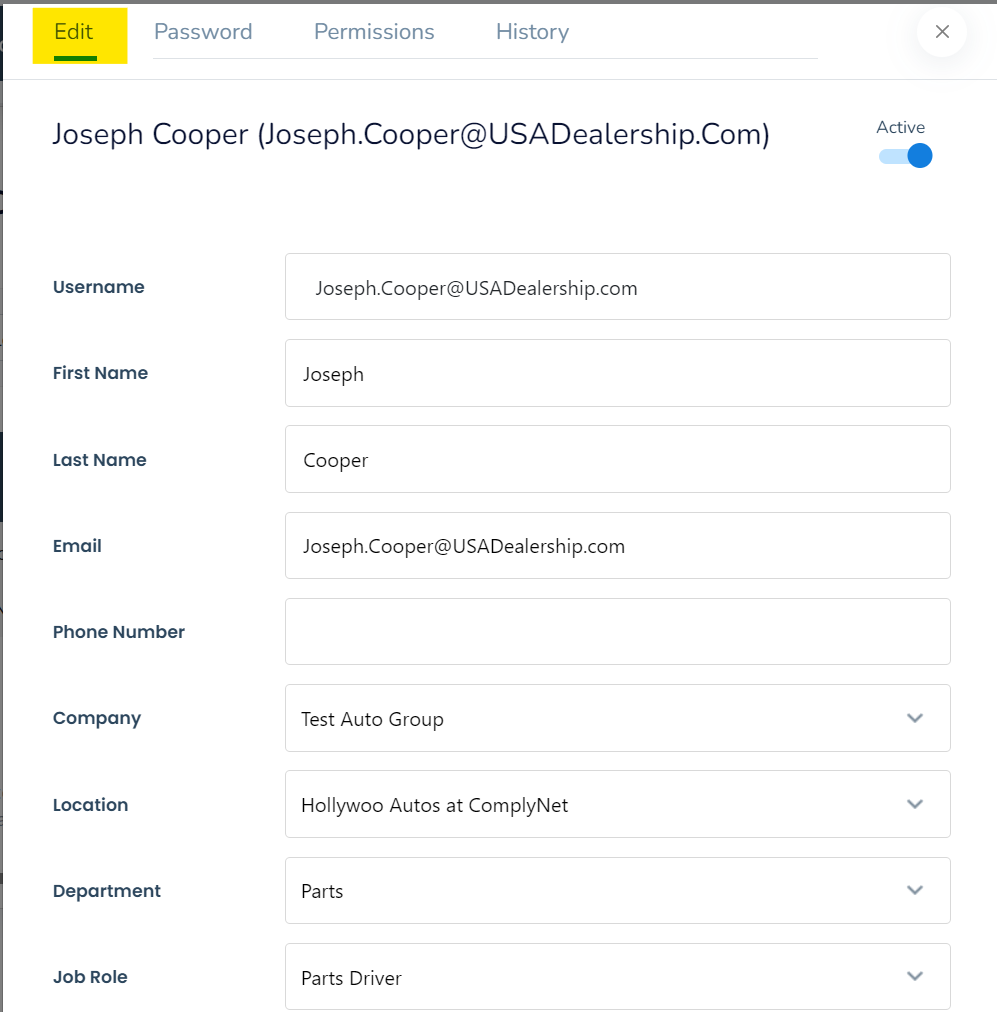
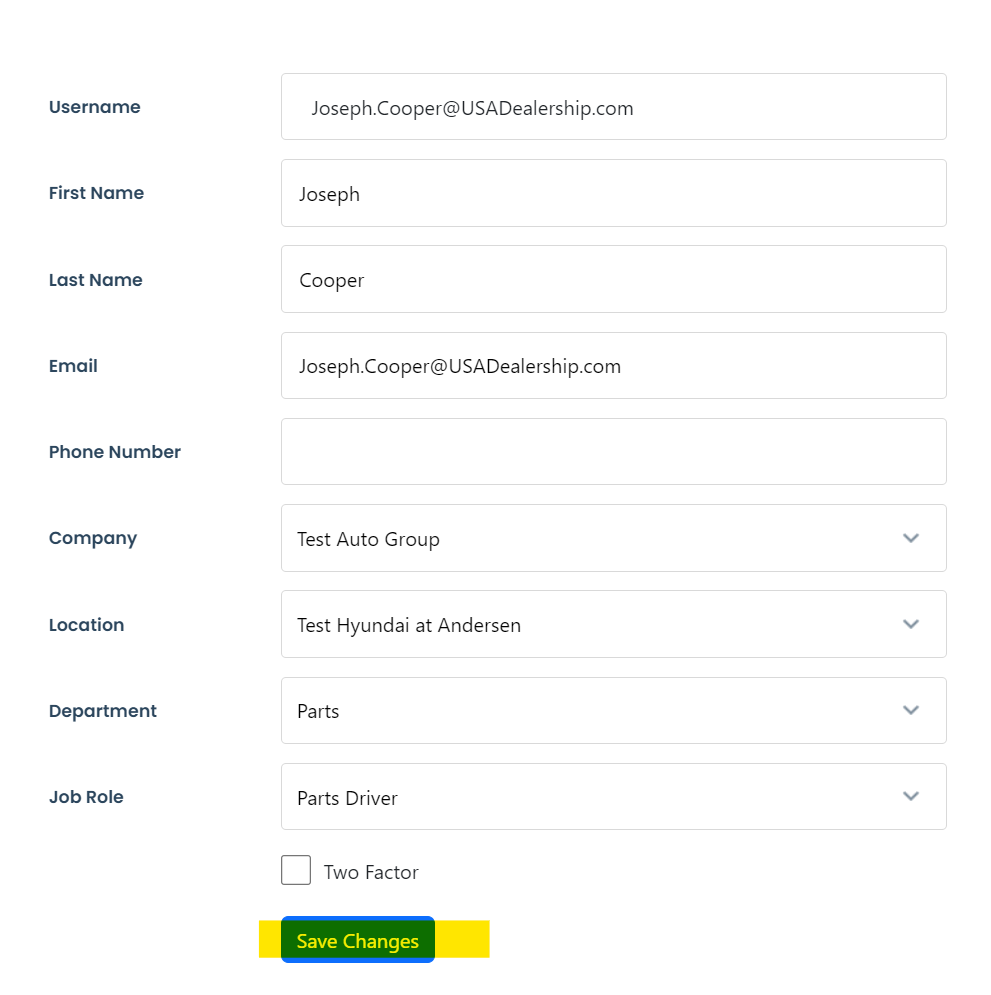
→ Notice the Location option. Clicking the currently listed location will reveal a drop down of available options.
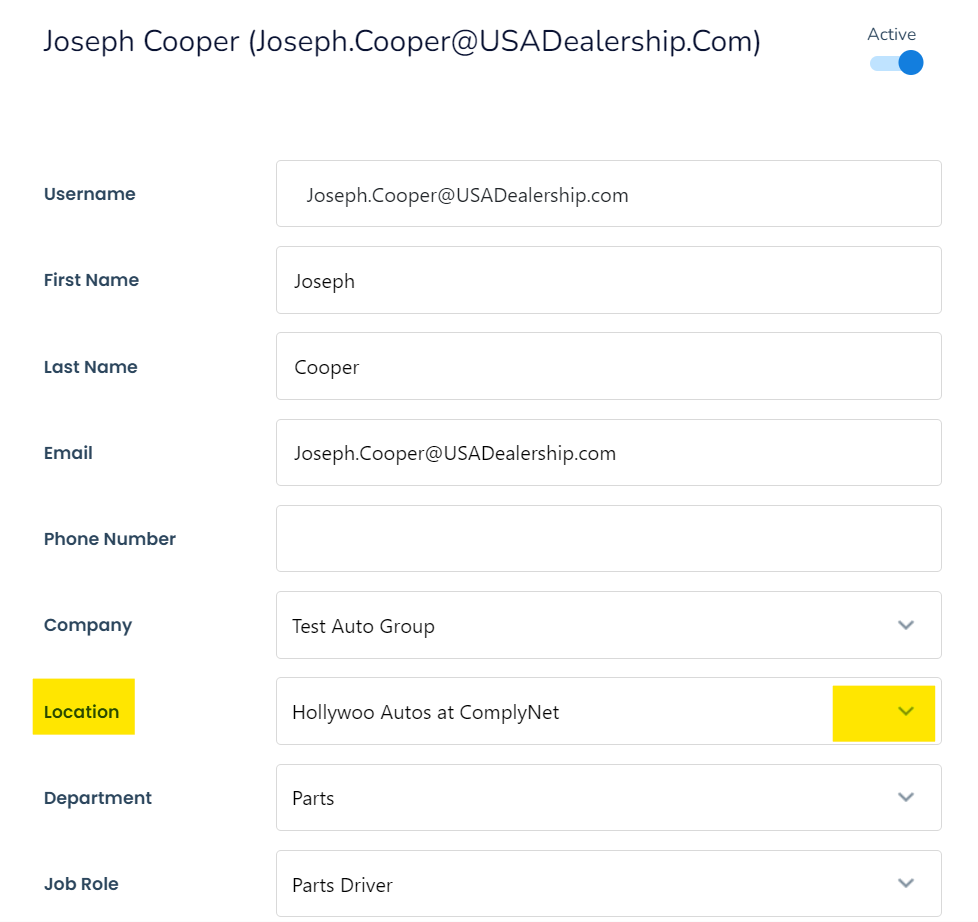
→ Choose the desired location from the drop-down menu to relocate the user.

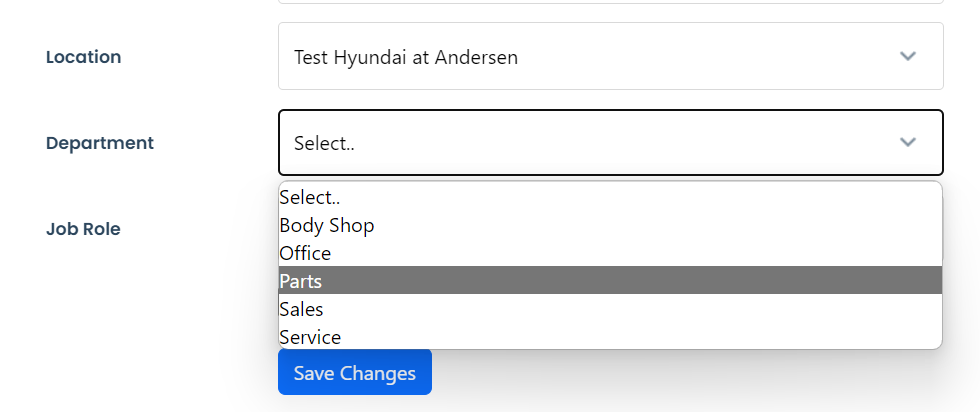
→ After selecting the desired location, continue with the same process to choose the department where the user should be assigned within the new location.
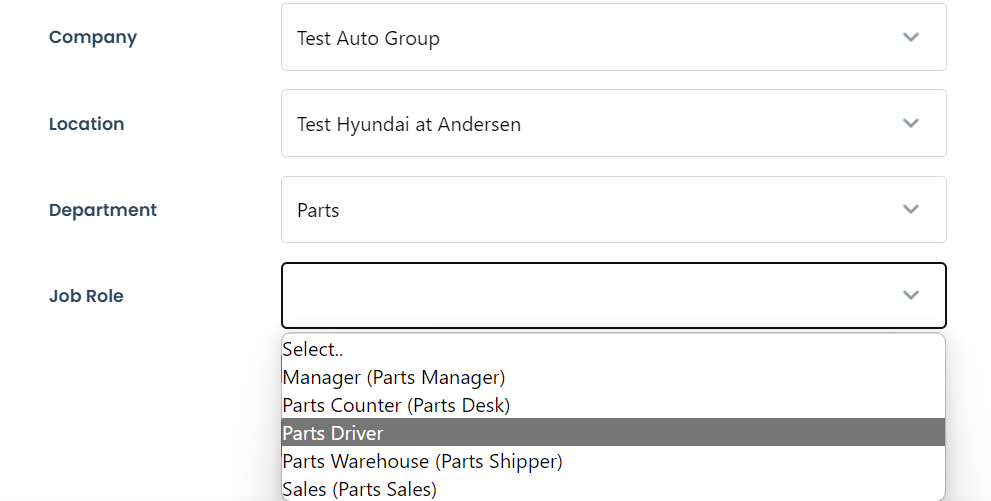
→ Once again, follow the same process and choose the desired job role for this user.
→ After you have completed the required modifications, double-check that all the information is correct and then click the "Save Changes" button to apply the modifications.
